Being able to start the application as standalone jar is great, but sometimes it might not be possible to run an app as jar [environment restrictions, company-wide regulations etc] and you have to build a WAR to be deployed into a traditional web/application server. Spring Boot helps us creating WAR using SpringBootServletInitializer.

Following technologies stack being used:
- Spring Boot 1.4.3.RELEASE
- Spring 4.3.5.RELEASE [transitively]
- Maven 3.1
- JDK 1.8
- Apache Tomcat 8.0.21
- Eclipse MARS.1
Let’s use the simple hello world application from previous post, generating a deployable war this time. Complete project as usual is available in download section.
Step 1: Extend from SpringBootServletInitializer
SpringBootServletInitializer is an abstract class implementing WebApplicationInitializer interface , the main abstraction for servlet 3.0+ environments in order to configure the ServletContext programmatically. It binds Servlet, Filter and ServletContextInitializer beans from the application context to the servlet container.
Create a class which extends SpringBootServletInitializer, overriding it’s configure method. You could as well let your application’s main class to extend SpringBootServletInitializer:
Main class
package com.websystique.springboot;

import org.springframework.boot.SpringApplication;
import org.springframework.boot.autoconfigure.SpringBootApplication;
import org.springframework.boot.builder.SpringApplicationBuilder;
import org.springframework.boot.web.support.SpringBootServletInitializer;

@SpringBootApplication(scanBasePackages={"com.websystique.springboot"})// same as @Configuration @EnableAutoConfiguration @ComponentScan
public class SpringBootStandAloneWarApp extends SpringBootServletInitializer{


    @Override
    protected SpringApplicationBuilder configure(SpringApplicationBuilder application) {
        return application.sources(SpringBootStandAloneWarApp .class);
    }

    public static void main(String[] args) {
		SpringApplication.run(SpringBootStandAloneWarApp.class, args);
	}
}
Step 2: Update packaging to ‘war’
<project xmlns="http://maven.apache.org/POM/4.0.0" xmlns:xsi="http://www.w3.org/2001/XMLSchema-instance"
	xsi:schemaLocation="http://maven.apache.org/POM/4.0.0 http://maven.apache.org/xsd/maven-4.0.0.xsd">
	<modelVersion>4.0.0</modelVersion>

	<groupId>com.websystique.springboot</groupId>
	<artifactId>SpringBootStandAloneWarExample</artifactId>
	<version>1.0.0</version>
	<packaging>war</packaging>

	<name>${project.artifactId}</name>

	<parent>
		<groupId>org.springframework.boot</groupId>
		<artifactId>spring-boot-starter-parent</artifactId>
		<version>1.4.3.RELEASE</version>
	</parent>
......
Step 3 : Exclude the embedded container from ‘war’
As we will be deploying the WAR to external container, we don’t want the embedded container to be present in war in order to avoid any interference. Just mark the embedded container dependency as ‘provided’.
                <dependency>
                    <groupId>org.springframework.boot</groupId>
                    <artifactId>spring-boot-starter-tomcat</artifactId>
                    <scope>provided</scope>
                </dependency>
The Resulting POM would be
pom.xml
<project xmlns="http://maven.apache.org/POM/4.0.0" xmlns:xsi="http://www.w3.org/2001/XMLSchema-instance"
	xsi:schemaLocation="http://maven.apache.org/POM/4.0.0 http://maven.apache.org/xsd/maven-4.0.0.xsd">
	<modelVersion>4.0.0</modelVersion>

	<groupId>com.websystique.springboot</groupId>
	<artifactId>SpringBootStandAloneWarExample</artifactId>
	<version>1.0.0</version>
	<packaging>war</packaging>

	<name>${project.artifactId}</name>

	<parent>
		<groupId>org.springframework.boot</groupId>
		<artifactId>spring-boot-starter-parent</artifactId>
		<version>1.4.3.RELEASE</version>
	</parent>

	<properties>
		<java.version>1.8</java.version>
		<startClass>SpringBootStandAloneWarApp</startClass>
	</properties>

	<dependencies>
		<!-- Add typical dependencies for a web application -->
		<!-- Adds Tomcat and Spring MVC, along others -->
		<dependency>
			<groupId>org.springframework.boot</groupId>
			<artifactId>spring-boot-starter-web</artifactId>
		</dependency>
		<dependency>
			<groupId>org.springframework.boot</groupId>
			<artifactId>spring-boot-starter-freemarker</artifactId>
		</dependency>
		<dependency>
			<groupId>org.springframework.boot</groupId>
			<artifactId>spring-boot-starter-tomcat</artifactId>
			<scope>provided</scope>
		</dependency>
	</dependencies>


	<build>
		<plugins>
			<plugin>
				<groupId>org.springframework.boot</groupId>
				<artifactId>spring-boot-maven-plugin</artifactId>
				<configuration>
				        <!-- this will get rid of version info from war file name -->
					<finalName>${project.artifactId}</finalName>
				</configuration>
			</plugin>
		</plugins>
	</build>
</project>
Now you can build [mvn clean package] and deploy the war to your external container.
LOCAL vs REMOTE or JAR vs WAR
Above pom.xml is good for producing WAR file, but what if we also need to run it locally [in IDE e.g.] during development. We can take advantage of Maven profiles to get best of both, producing JAR or WAR based on the environment.
A rewrite of above pom.xml handling both packaging would be:
updated pom.xml
<project xmlns="http://maven.apache.org/POM/4.0.0" xmlns:xsi="http://www.w3.org/2001/XMLSchema-instance"
	xsi:schemaLocation="http://maven.apache.org/POM/4.0.0 http://maven.apache.org/xsd/maven-4.0.0.xsd">
	<modelVersion>4.0.0</modelVersion>

	<groupId>com.websystique.springboot</groupId>
	<artifactId>SpringBootStandAloneWarExample</artifactId>
	<version>1.0.0</version>
	<packaging>${artifact-packaging}</packaging>

	<name>${project.artifactId}</name>

	<parent>
		<groupId>org.springframework.boot</groupId>
		<artifactId>spring-boot-starter-parent</artifactId>
		<version>1.4.3.RELEASE</version>
	</parent>

	<properties>
		<java.version>1.8</java.version>
		<startClass>SpringBootStandAloneWarApp</startClass>
		<!-- Additionally, Please make sure that your JAVA_HOME is pointing to
			1.8 when building on commandline -->
	</properties>

	<dependencies>
		<!-- Add typical dependencies for a web application -->
		<!-- Adds Tomcat and Spring MVC, along others -->
		<dependency>
			<groupId>org.springframework.boot</groupId>
			<artifactId>spring-boot-starter-web</artifactId>
		</dependency>
		<dependency>
			<groupId>org.springframework.boot</groupId>
			<artifactId>spring-boot-starter-freemarker</artifactId>
		</dependency>
	</dependencies>


	<build>
		<plugins>
			<plugin>
				<groupId>org.springframework.boot</groupId>
				<artifactId>spring-boot-maven-plugin</artifactId>
			</plugin>
		</plugins>
	</build>

	<profiles>
		<profile>
			<id>local</id>
			<activation>
				<activeByDefault>true</activeByDefault>
			</activation>
			<properties>
				<artifact-packaging>jar</artifact-packaging>
			</properties>
		</profile>
		<profile>
			<id>remote</id>
			<properties>
				<artifact-packaging>war</artifact-packaging>
			</properties>
			<dependencies>
				<dependency>
					<groupId>org.springframework.boot</groupId>
					<artifactId>spring-boot-starter-tomcat</artifactId>
					<scope>provided</scope>
				</dependency>
			</dependencies>
			<build>
				<plugins>
					<plugin>
						<groupId>org.springframework.boot</groupId>
						<artifactId>spring-boot-maven-plugin</artifactId>
						<version>1.4.3.RELEASE</version>
						<configuration>
  				                   <!-- this will get rid of version info from war file name -->
							<finalName>${project.artifactId}</finalName>
						</configuration>
					</plugin>
				</plugins>
			</build>
		</profile>
	</profiles>
</project>
Now, while running locally [on IDE or as a FAT jar], JAR would be used[thanks to default profile]. When you want to prepare WAR for remote serer, use mvn clean install -P remote. It will produce WAR which you can simply deploy in external container. In this post, we are deploying it in tomcat 8.0.21, by putting the resultant war file in webapps folder and starting the tomcat[bin/startUp.bat].


Complete Example
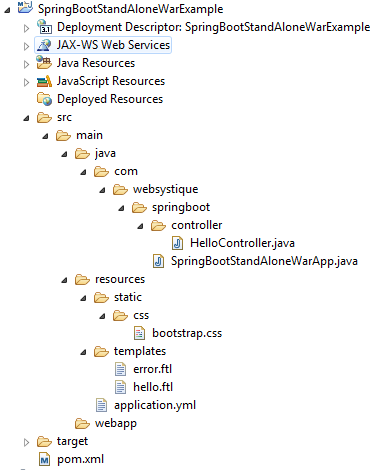
Project Structure

application.yml
server:
  port: 8080
  contextPath: /SpringBootStandAloneWarExample
templates
hello.ftl
<!DOCTYPE html>

<html lang="en">
<head>
    <link rel="stylesheet" type="text/css" href="css/bootstrap.css" />
</head>
<body>
	<div class="container">
	    <div class="jumbotron">
	        <h2>${title}</h2>
	        <p>${message}</p>
	    </div>
	</div>
</body>
</html>
error.ftl
<!DOCTYPE html>

<html lang="en">
<head>
    <link rel="stylesheet" type="text/css" href="css/bootstrap.css" />
</head>
<body>
	<div class="container">
	    <div class="jumbotron alert-danger">
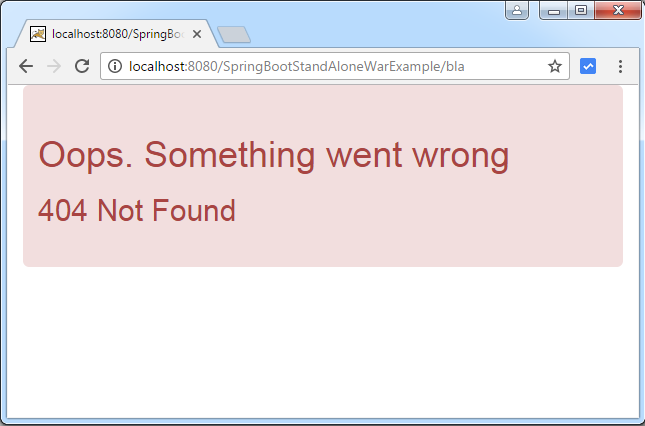
			<h1>Oops. Something went wrong</h1>
			<h2>${status} ${error}</h2>
	    </div>
	</div>
</body>
</html>
Controller
HelloController.java
package com.websystique.springboot.controller;

import org.springframework.stereotype.Controller;
import org.springframework.ui.ModelMap;
import org.springframework.web.bind.annotation.RequestMapping;

@Controller
public class HelloController {

	@RequestMapping("/")
	String home(ModelMap modal) {
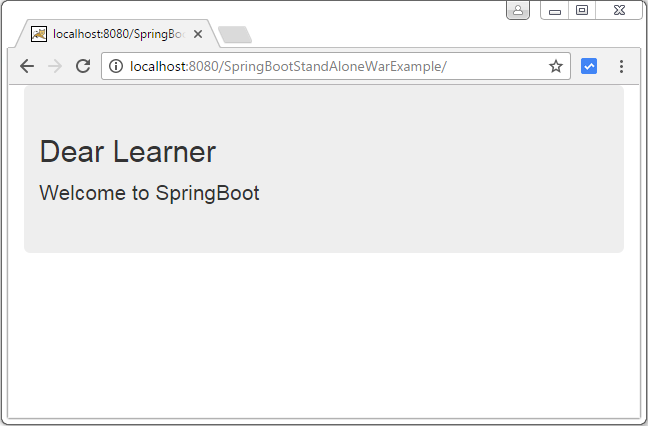
		modal.addAttribute("title", "Dear Learner");
		modal.addAttribute("message", "Welcome to SpringBoot");
		return "hello";
	}
}
Conclusion
Traditional WAR deployment has it’s place and is going to be there for quite some time. Sometimes it is not even possible to run an app as a jar due to policy reasons. Spring Boot helps on both the fronts, providing necessary support. Make sure to check our other posts on Spring Boot, we will be covering lots of concepts here. Feel free to write your thoughts in comment section.
Download Source Code
References
If you like tutorials on this site, why not take a step further and connect me on Facebook , Google Plus & Twitter as well? I would love to hear your thoughts on these articles, it will help improve further our learning process.